A template for setting up Node.js-backed web apps on EC2
Quick web hacks are great fun — getting an idea, realizing it and publishing it during a day or three. What usually sucks the fun out of these things—when building websites—is the whole “server setup” dance. You need to fix access to a server, install an operating system, registering a domain name, configure software, etc.
 I’ve become quite fond of the Amazon Elastic Compute Cloud (EC2) — a widely popular service for creating virtual servers. So I’ve found myself repeating practically the same steps for every site launched on EC2 (dropular.net and spotni.cc, for instance). This is something I think many people could benefit from, so I’ve put together a sort of template for quickly setting up a web site on EC2:
https://github.com/rsms/ec2-webapp
Key features include:
- About 20 minutes from start to finish*
- Eligible for/compatible with the “AWS Free Usage Tier”
- Runs Ubuntu Linux
- Optional Node.js support
- Git-based deployment
- Init.d scripts for integrating Node.js services with the system
* It takes ~10 minutes to build Node.js and about 10 minutes of actual work from your part.
What’s really nice with this setup is that you deploy changes with git, automagically giving you the power to roll back to previous versions when you break stuff. The common workflow (or hackflow) is as easy as:
cd myapp
bin/myapp-httpd.mv
# hack hack test hack test...
git commit
git push
myapp-update restart
The myapp-update command simply ssh’s to your server and makes it pull and checkout the latest version, optionally restarting services (like Node.js servers or daemons).
Minimal “technical bureaucracy” yield more time for creative focus — just the way it should be, and we’re not compromising on versioning or orthogonality.
Getting started with EC2
Let’s start by creating an account at Amazon Web Services: Visit https://aws-portal.amazon.com/gp/aws/developer/registration/index.html and log in or create an account.
When you have created your account, head over to the AWS Management Console — a relatively easy-to-use web interface for starting and managing virtual servers. It should look something like this:
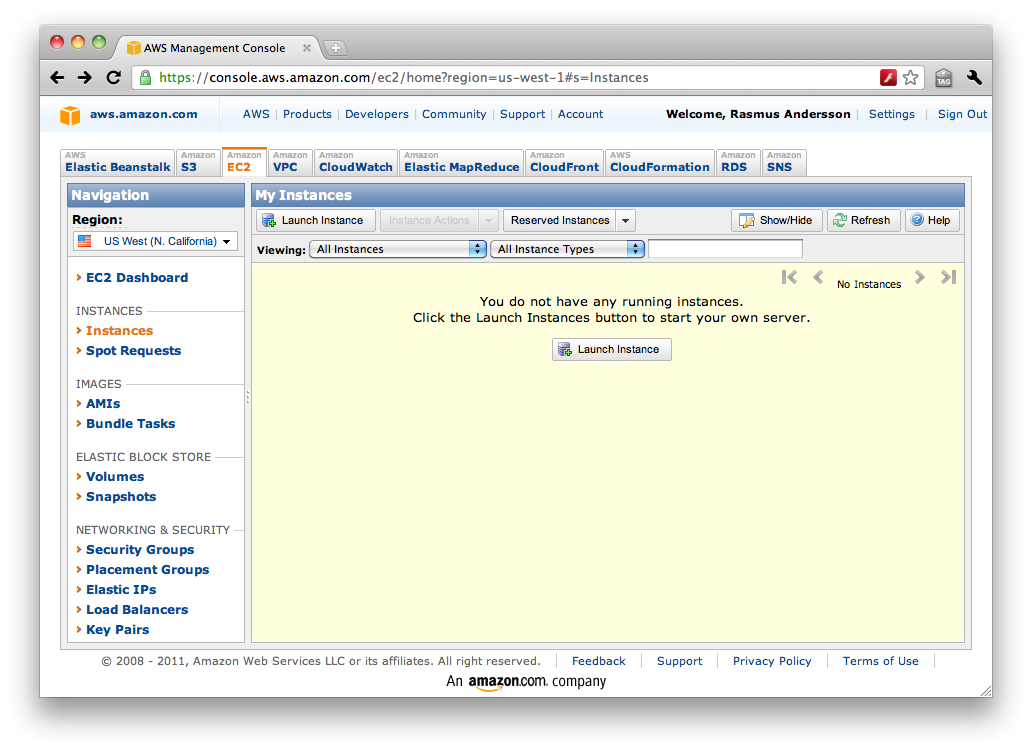
Depending on where in the world your and/or your users are, you can chose one of several geographic regions. A rule of thumb is that the farther away a server is located, the slower will it be to access. In the top-left corner you find a selection box labelled “Region”. Click it to switch to any of the available regions.
- If you live in Asia, pick one of the Asia regions
- If you live in Europe and have mostly European visitors, pick the EU region
- If you live in the eastern parts of the USA (or in western Europe with visitors from around the world), pick the “US east” region
- If you live in the western parts of the USA, pick the “US west” region
After choosing your geographical region, click the alluring “Launch instance” button, chose “Community AMIs” and type in one of the following AMIs (a code identifying a specific operating system) into the filter text box:
- US west:
ami-ad7e2ee8 - US east:
ami-ccf405a5 - EU west:
ami-fb9ca98f - Asia Pacific (Singapore):
ami-0c423c5e
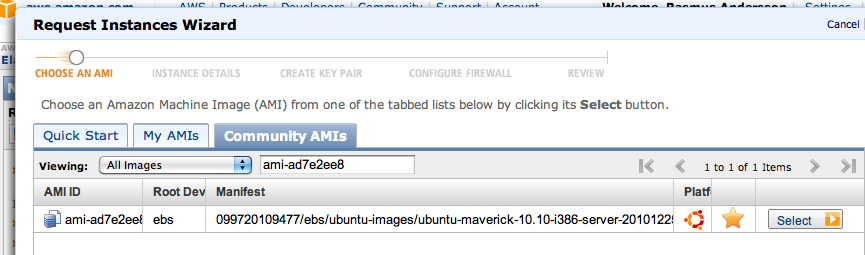
Click the “Select” button of the machine and it’s time to enter some “Instance details”. Note that we will use the term “instance” from here on — it’s the name Amazon uses for “virtual machine” or “server”.
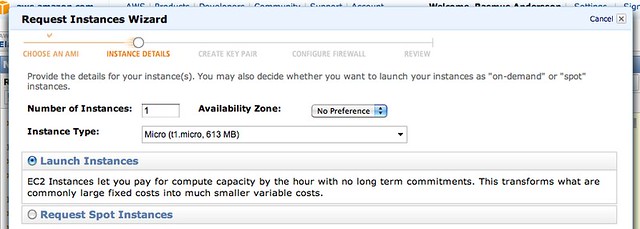
Let the “Number of instances” and “Availability Zone” be at their default values (“1” and “No Preference”). For “Instance Type”, chose “Micro” and click the “Continue” button.
For the next step, the only thing we want to change is the last setting; “Shutdown Behavior”. Set this to “Stop”, otherwise your server will disappear into the void of cyberspace if you accidentally type sudo shutdown when logged in:
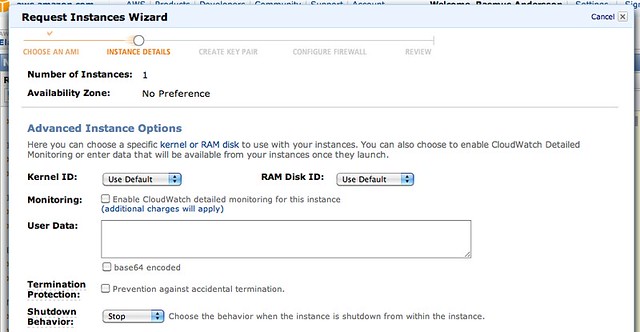
Then click the meaty “Continue” button.
During the next step, simply give the instance a name of your choice and once again click “Continue”.
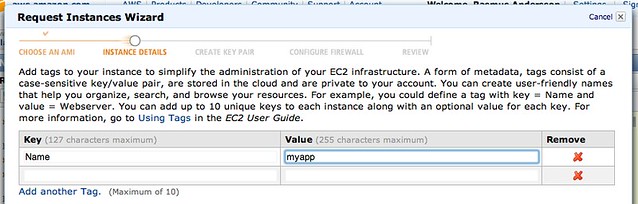
We are now going to “Create a new Key Pair”. Enter a name for the key and click the “Create & Download your Key Pair” link:
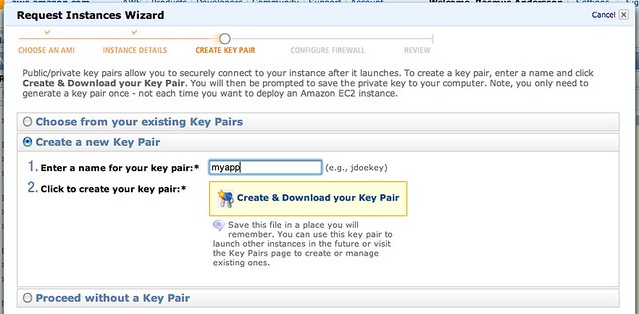
Important: This is the one key providing access to your new server. If you lose it you will no longer be able to access the server, so make sure to make a secure backup (e.g. send yourself an email with the key attached using a secure email provider like Gmail, or put it on an encrypted USB drive).
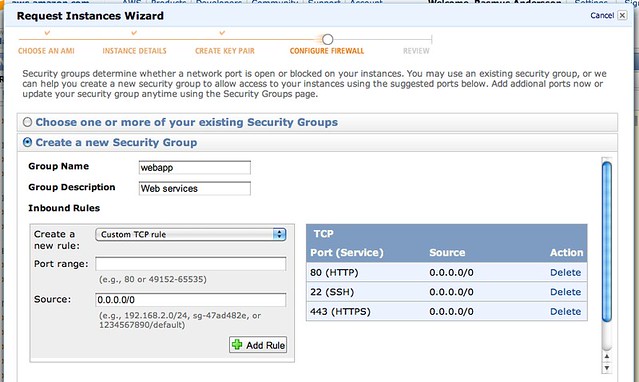
Then continue to the next step where we will “Create a new Security Group”. Name it “webapp” and add three of the pre-defined rules available in the “Create a new rule” drop-down box: SSH, HTTP and HTTPS:
Click our favorite “Continue” button and you should get a summary of your configuration. Review the details and when feeling like a happy little puppy, press firmly on the “Launch” button.

Your instance will start to launch. Close the “wizard”, wait a few seconds and you should see something like this (select your instance in the list if the bottom part is empty):
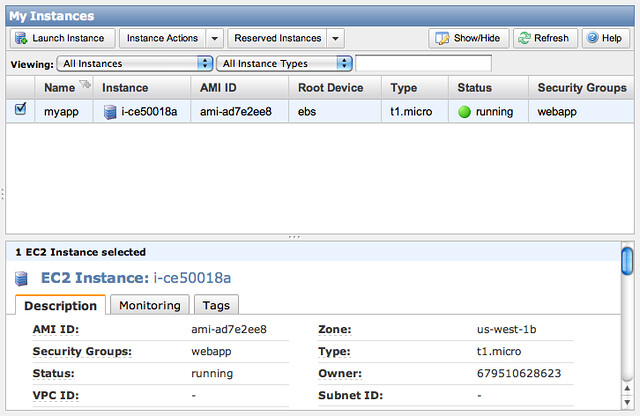
In the bottom part “Description” you will find the address of your instance labelled “Public DNS” (it should look similar to ec2-123-123-123-123.us-west-1.compute.amazonaws.com). Select, copy!
Now, let’s log in to our new server:
ssh -i path/to/myapp.pem [email protected]
Where path/to/myapp.pem above should be replaced by the actual path of your private key (which we downloaded during the “Create a new Key Pair” step) and XXX.compute.amazonaws.com replaced with the “Public DNS” of your instance.
You should now be logged in to the server as the “ubuntu” user. Note that you should not (and can not, by default) log in as the “root” user. Instead, use the sudo command to execute stuff with super-user privileges.
It’s time to get busy — Head over to INSTALL.md “Install software” →